Start here
Account setup
Set up the basics in EBI's AI Studio: AI name, domains, and key AI settings.
Outcome
By the end of this guide you will have the key settings checked and configured so your AI assistant behaves as you expect.
Prerequisites
- You can sign in to EBI's AI Studio
- You have permission to edit settings (if you don’t see a setting, it may be plan- or role-dependent)
Steps
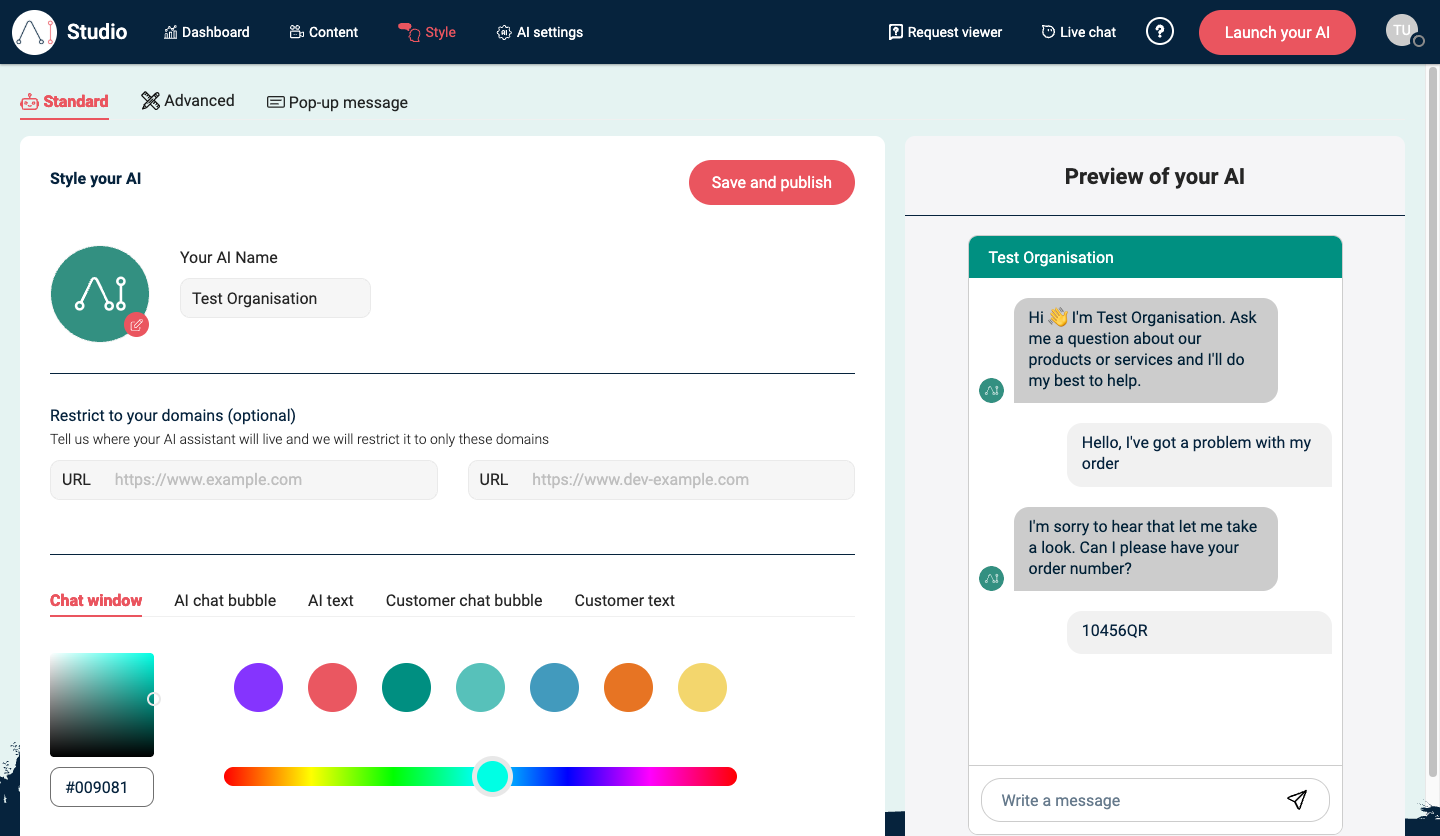
1) Set your AI name and allowed domains (recommended)
- In the top navigation, select Style.
- Under Standard, review:
- Your AI Name
- Restrict to your domains (optional) (recommended if you’re using Web Messenger)
- Select Save and publish.
For the full appearance and allowed-domain workflow, see Style.
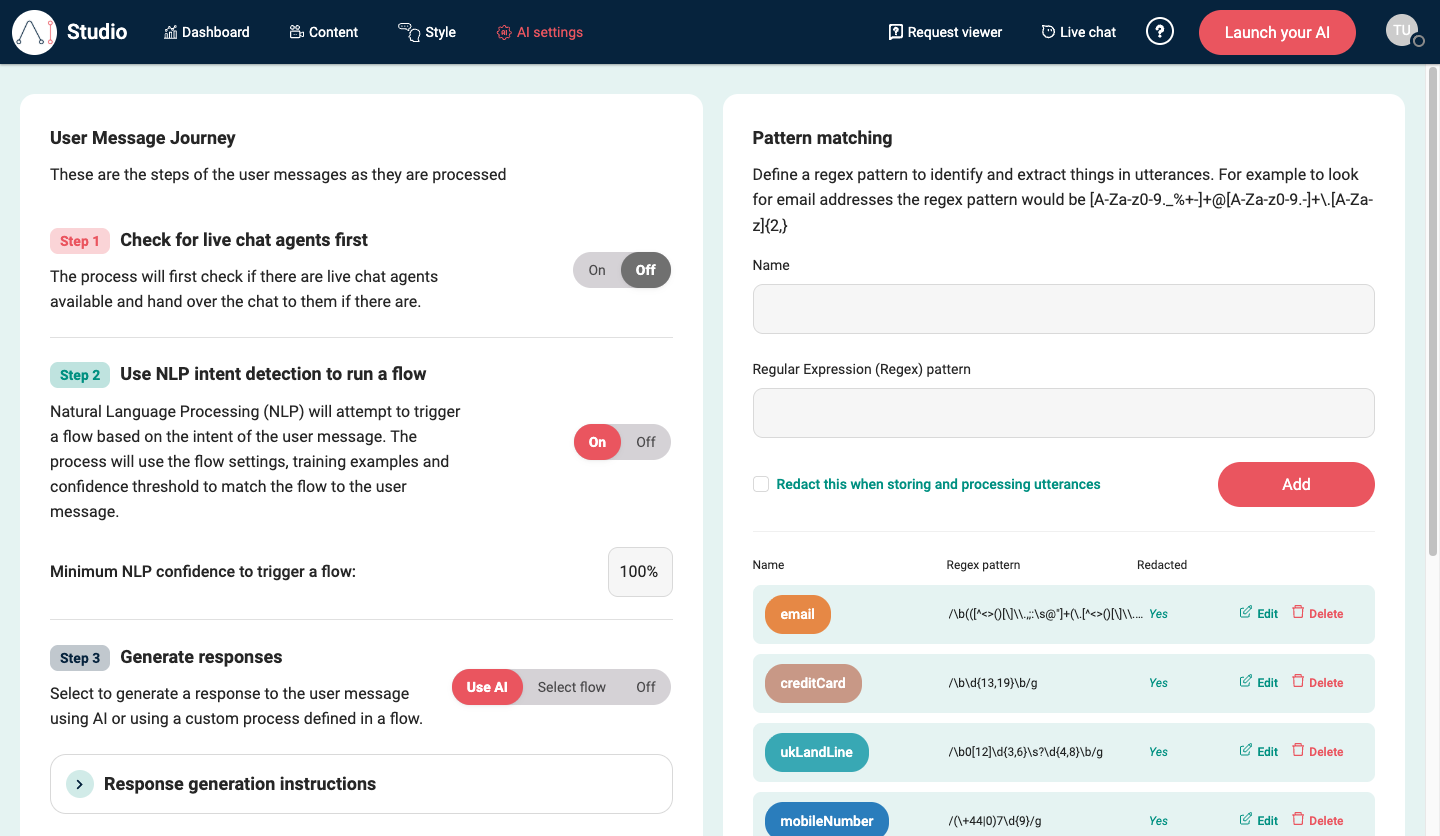
2) Review AI settings (recommended)
- In the top navigation, select AI settings.
- Under User Message Journey, review how messages are processed, including:
- Step 1: Check for live chat agents first
- Step 2: Use NLP intent detection to run a flow
- Step 3: Generate responses (for example Use AI vs Select flow)
- If generated AI responses are enabled, review the response-generation panels, including:
- Response generation instructions
- Allow AI to use tools (if available to your plan)
For more detail, see AI settings.
3) Set up live chat (if you use it)
If you plan to support live chat handover:
- Go to Live chat operations to add team members and working hours.
4) Security, access, and billing (plan-dependent)
Some account-level settings may be managed outside the main UI depending on your plan. If you need to:
- Add/remove users
- Change roles/permissions
- Configure SSO/2FA requirements
- Update billing details
Contact your EBI account team.
Verify
- Your AI assistant name and domain restrictions appear in Style
- You can access Dashboard, Content, Style, AI settings, Request viewer, and Live chat
Common issues
- Web Messenger doesn’t show: check Restrict to your domains (optional) in Style, then select Save and publish.
- You can’t see a setting: your plan or role may not include it; contact your EBI account team.