Style
Configure Web Messenger appearance, allowed domains, widget position, and pop-up message settings.
Outcome
By the end of this guide you will know how to configure the look, placement, and website restrictions for Web Messenger.
Use Style before launching Web Messenger, and again whenever your assistant name, branding, website domains, or chat button placement changes.
Prerequisites
- You can sign in to EBI's AI Studio
- You have permission to edit Style
- You know which website domains should be allowed to load Web Messenger
- You have any brand colours or avatar image you want to use
Steps
1. Open Style
- In the top navigation, select Style.
- Review the three tabs:
- Standard
- Advanced
- Pop-up message
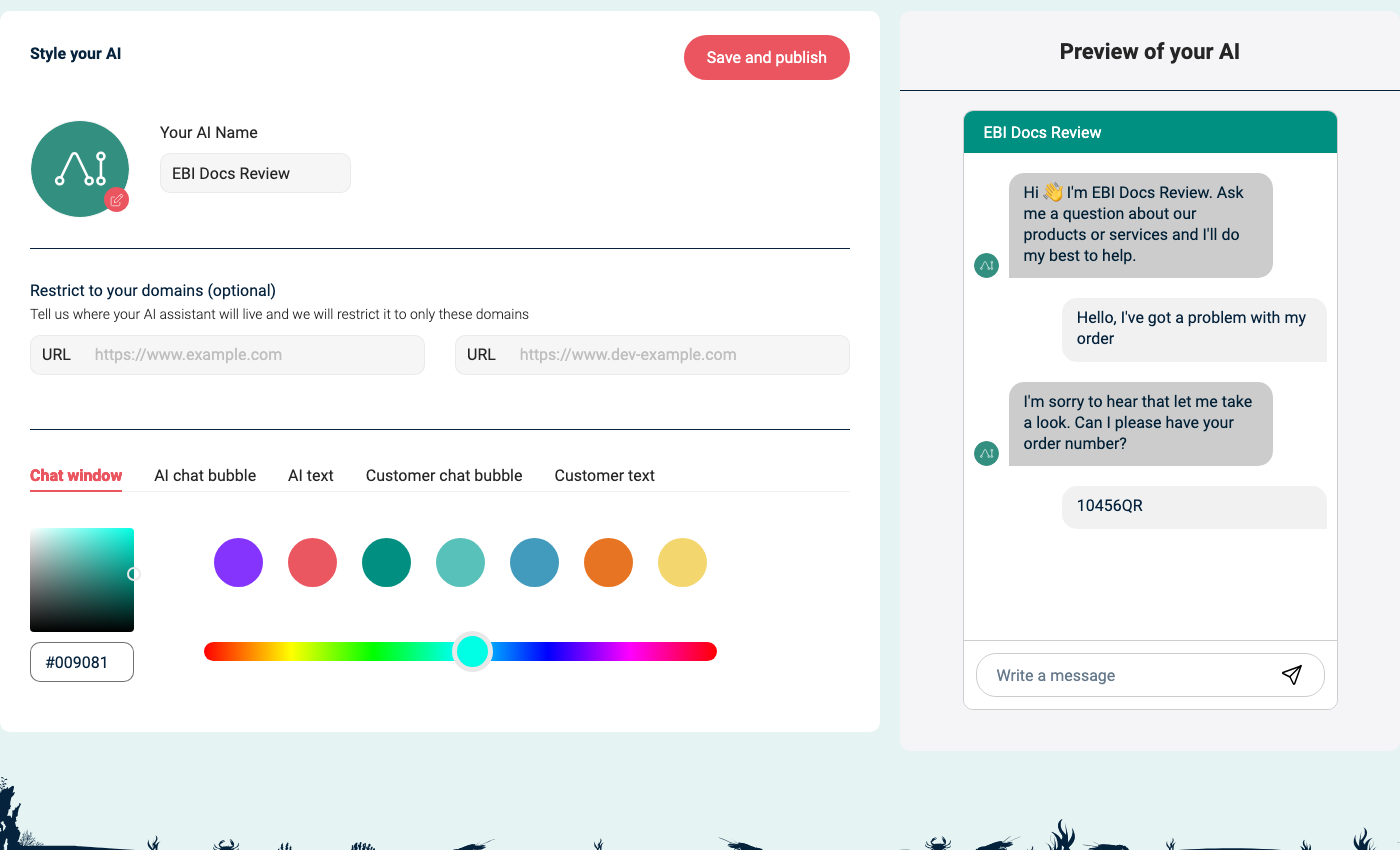
2. Set the Standard options
Use Standard for the core Web Messenger identity and colours.
| Setting | What it controls |
|---|---|
| Your AI Name | The name shown in Web Messenger and in the preview. |
| Avatar image | The assistant avatar. Select the small upload icon on the avatar image to upload a PNG or JPEG file. The product tooltip says the maximum file size is 2 MB. |
| Restrict to your domains (optional) | The websites allowed to load Web Messenger. |
| Chat window | The header colour used in the Web Messenger window. |
| AI chat bubble | The background colour for assistant messages. |
| AI text | The text colour for assistant messages. |
| Customer chat bubble | The background colour for visitor messages. |
| Customer text | The text colour for visitor messages. |
For Restrict to your domains (optional), enter the website domain rather than a specific page. For example, use https://www.example.com rather than a full product-page URL.
If you paste a page URL, EBI's AI Studio may remove the page path and save only the website domain.
If the domain format is wrong, EBI's AI Studio shows Wrong url format.
3. Set the Advanced options
Use Advanced when you need to change the Web Messenger launcher and placement.
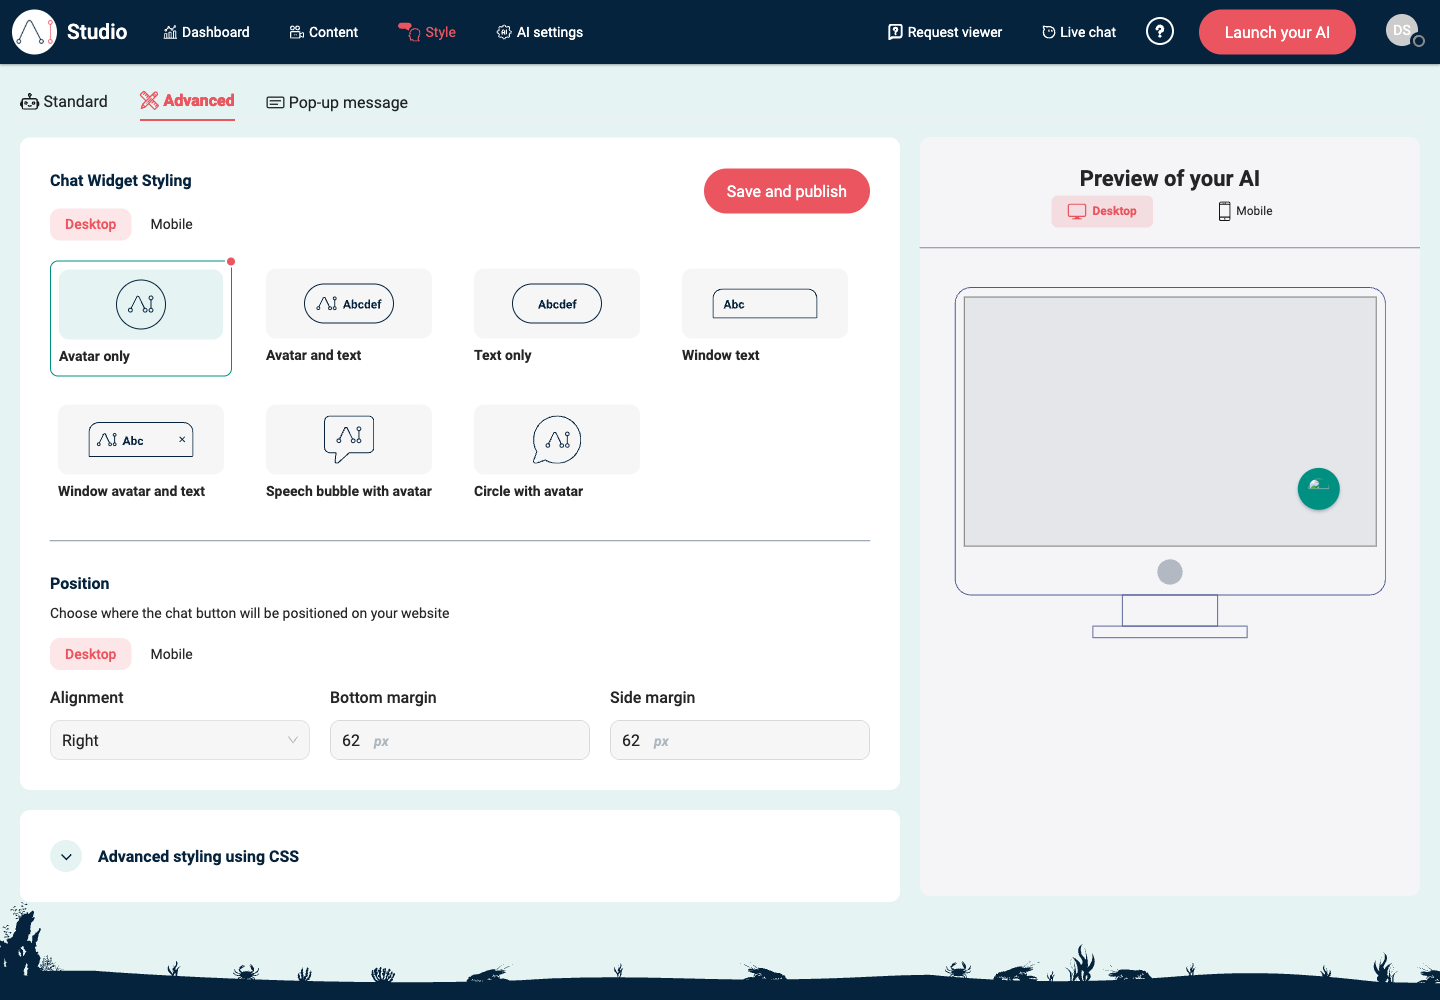
Under Chat Widget Styling, choose the chat button style for Desktop and Mobile:
| Option | Use it when |
|---|---|
| Avatar only | You want a compact launcher with only the assistant avatar. |
| Avatar and text | You want the launcher to show both the avatar and a text label. |
| Text only | You want a simple text launcher. |
| Window text | You want the launcher to look like a small window prompt. |
| Window avatar and text | You want a window-style launcher with the avatar and text. |
| Speech bubble with avatar | You want the launcher to look like a chat bubble. |
| Circle with avatar | You want a circular launcher. |
Under Position, choose settings separately for Desktop and Mobile:
| Setting | What it controls |
|---|---|
| Alignment | Whether the chat button appears on the left, right, or centre of the page. |
| Bottom margin | How many pixels the chat button sits above the bottom of the page. |
| Side margin | How many pixels the chat button sits away from the side of the page. |
Use Advanced styling using CSS only when you need a custom adjustment that the normal controls cannot make.
CSS fields are available for:
- Messenger window
- Header bar
- AI assistant response(s)
- Visitor message(s)
- Join message
- Widget button
- Messenger icon
- Generic element
- Feedback options
- Pop-up message
4. Set the Pop-up message options
Use Pop-up message to configure the short prompt shown near the chat button before a visitor opens Web Messenger.
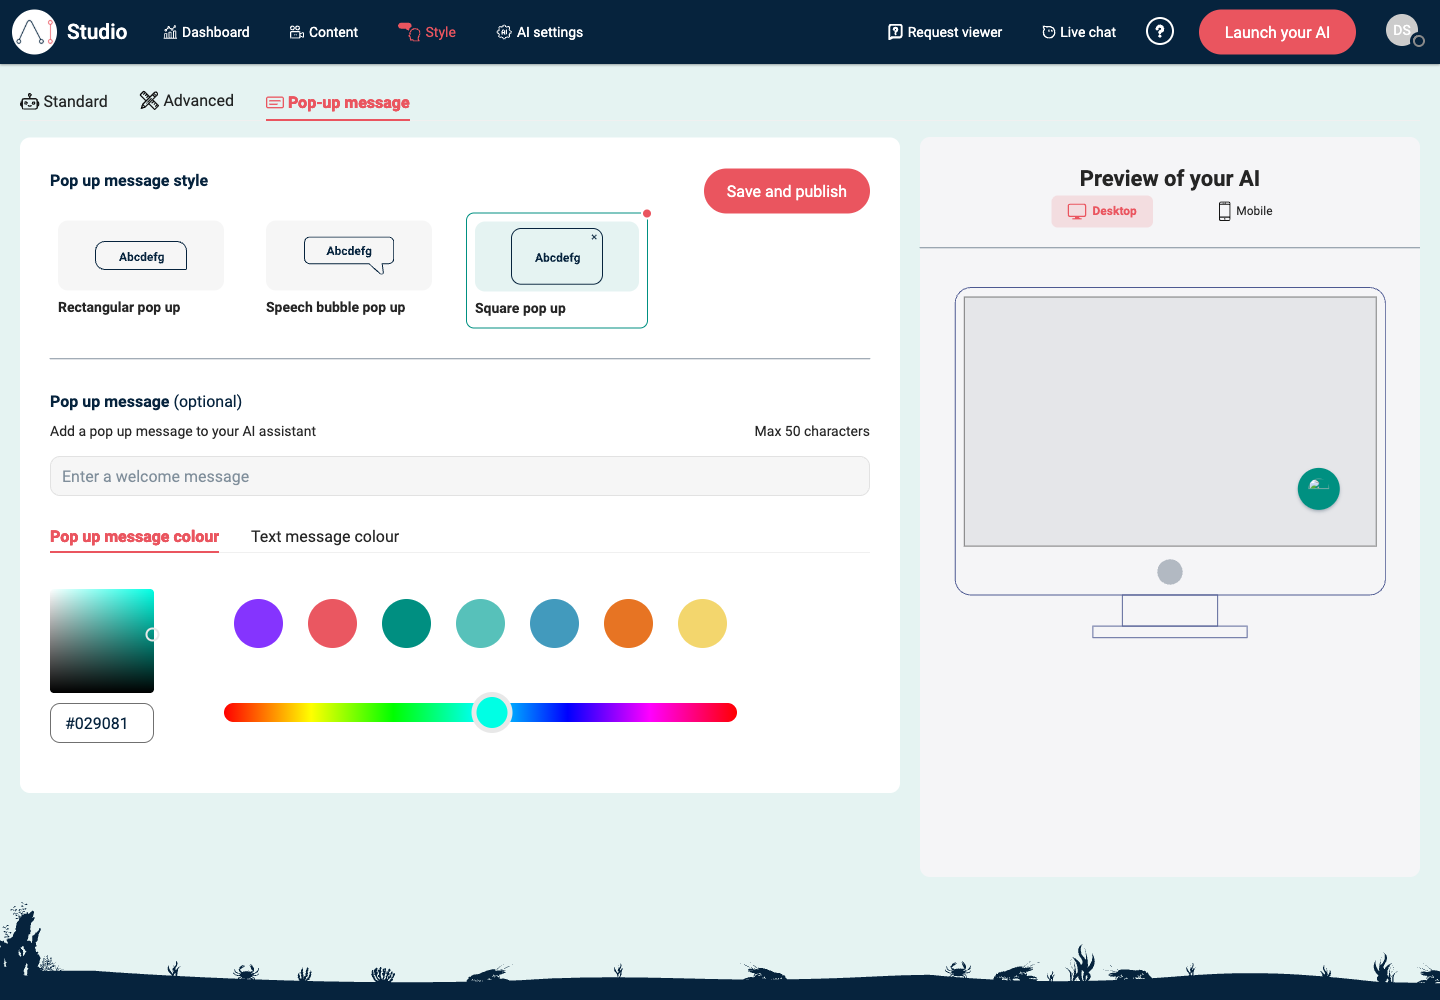
- Choose a pop-up shape:
- Rectangular pop up
- Speech bubble pop up
- Square pop up
- Under Pop up message (optional), enter the message text.
- Keep the message within Max 50 characters.
- Set Pop up message colour and Text message colour.
If the message is longer than 50 characters, EBI's AI Studio shows Maximum length is 50 characters.
5. Preview, save, and test
- Use Preview of your AI to check the visual result.
- Switch between Desktop and Mobile controls when you are changing launcher style or position.
- Select Save and publish on the tab you changed.
- If Web Messenger is already embedded on your website, open the website in a private browser window and confirm Web Messenger appears in the expected place.
- If Web Messenger is not embedded yet, use Preview of your AI for the pre-launch visual check, then test on your website after you install Web Messenger.
Verify
- Preview of your AI shows the expected assistant name, colours, and chat layout.
- Web Messenger loads only on the domains you expect.
- The chat button appears in the expected position on desktop and mobile.
- The pop-up message appears with the expected shape, text, and colours.
- After Web Messenger has been embedded, changes are visible on your website after Save and publish.
Common Issues
- Web Messenger does not show on your site: check Restrict to your domains (optional), confirm the domain format, then select Save and publish.
- Style is not visible in the top navigation: ask the person who manages your AI Studio access to check whether your user role can edit Style.
- The launcher appears in the wrong place: check Alignment, Bottom margin, and Side margin under Advanced for both Desktop and Mobile.
- The avatar upload fails: use a PNG or JPEG image smaller than 2 MB.
- The pop-up message is rejected: shorten it to 50 characters or fewer.
- CSS changes are rejected: each CSS rule must use the format
property: value;. - Saved changes are not visible on the website: refresh the page, test in a private browser window, and confirm the website is loading the current Web Messenger snippet.